Python to Automate Daily Tasks: How to Move JPG Images Using Python
Do you know how to move images from one folder to another using Python? If not, here is how to use Python to automate daily tasks.
If you ever find yourself with a folder full of .jpg images that need to be organized into another directory, Python can help you do that quickly and efficiently. This article will walk you through a simple script that moves .jpg image files from one folder to another using Python.
Let’s start with the tools we need. Python provides built-in modules like os and shutil to interact with your computer’s file system. The os Module lets you list files in a folder and check their names, while shutil helps you move or copy files.
Read more >>> Why Python is the Most Popular Programming Language
Simple Script to Automate Your Task
Here’s a simple script that does exactly that:
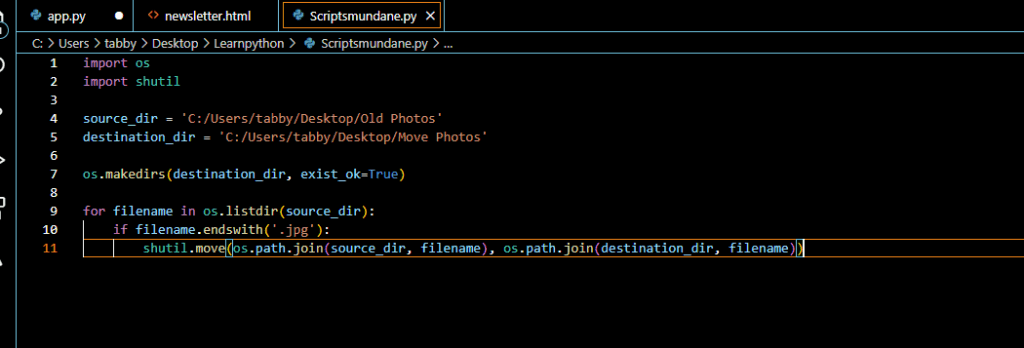
import os
import shutil

source_dir = 'path/to/source'
destination_dir = 'path/to/images'

os.makedirs(destination_dir, exist_ok=True)

for filename in os.listdir(source_dir):
    if filename.endswith('.jpg'):
        shutil.move(os.path.join(source_dir, filename), os.path.join(destination_dir, filename))
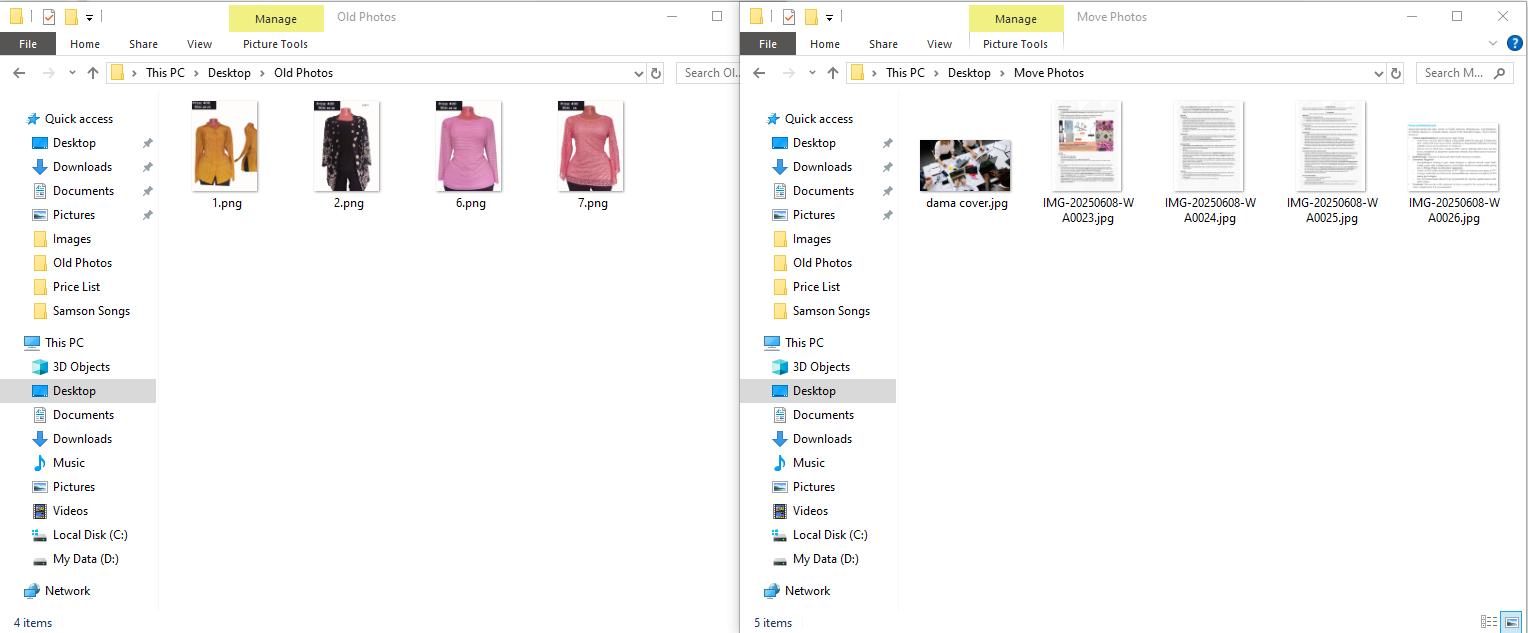
Now, this is what you will do to achieve the results: create two folders and name them Old Photos and Moved Photos on your Desktop.

Now copy and paste a mix of images that have an extension og .jpg, .png to the folder “Old Photos.
Copy the path; for my case, look at the screenshot below and check lines 4 and 5. Make sure they look almost the same according to your pc name.
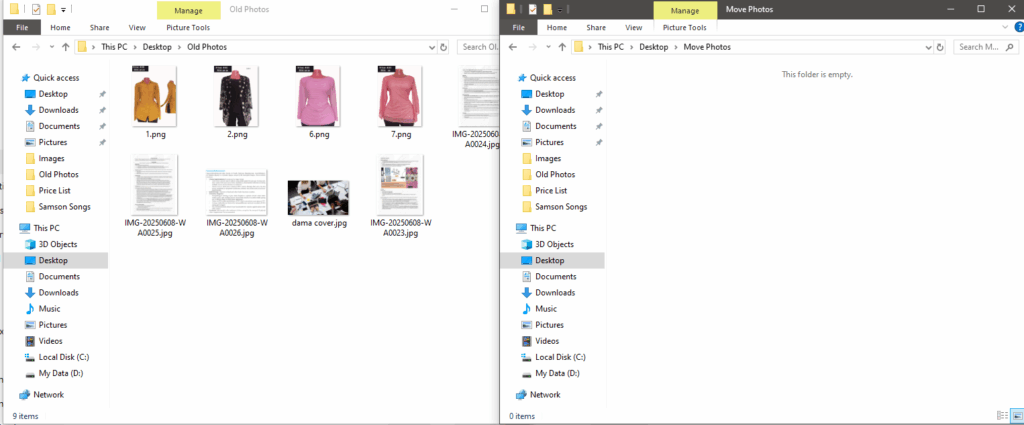
Now run the code and see if the photos will be moved to your new destination.

How It Works:
- Importing Modules: The script begins by importing
osandshutil. These modules allow your Python script to work with files and directories on your computer. - Setting Paths: You need to specify two folders: the source folder (where the images are) and the destination folder (where you want the images to go). Replace
'path/to/source'and'path/to/images'with the actual paths on your system. - Creating the Destination Folder: The line
os.makedirs(destination_dir, exist_ok=True)checks if the destination folder exists. If it doesn’t, it creates it. This prevents the program from crashing if the folder doesn’t exist. - Looping Through Files: The script then loops through every file in the source directory using
os.listdir(source_dir). It checks if a file ends with.jpgand then moves it. - Moving Files: If the file is a
.jpg, the script moves it usingshutil.move(). It combines the folder path and filename correctly usingos.path.join()to avoid errors.
Final Thoughts
This script is perfect for beginners who want to learn file handling in Python. Whether you’re organizing family photos or working on a larger automation task, this approach can save you hours of manual work. Try it out, modify it for different file types, and explore how you use Python to automate daily tasks!
Now, continue with the article >>> Python in Everyday Life: How to Make it a Hobby